INTRODUCTION
In this blog, we are going to see how to set a budget for our AWS services and managing them according to our needs. Creating budgets will help to monitor the costs related to our services in AWS, we have notification setting which will notify us if we are approaching some percentage (80%) to your total budget then we can set our email address to get the notification regarding that.
This is very important for any kind of organizations who are using AWS for their networks, maintaining the costs and setting up the services which costs reasonable will be done by AWS Architect. So let’s see how to set up budgeting in AWS:
STEP 1: Select the Account number or Name at the top right which will drop down a menu and click on “My Account”
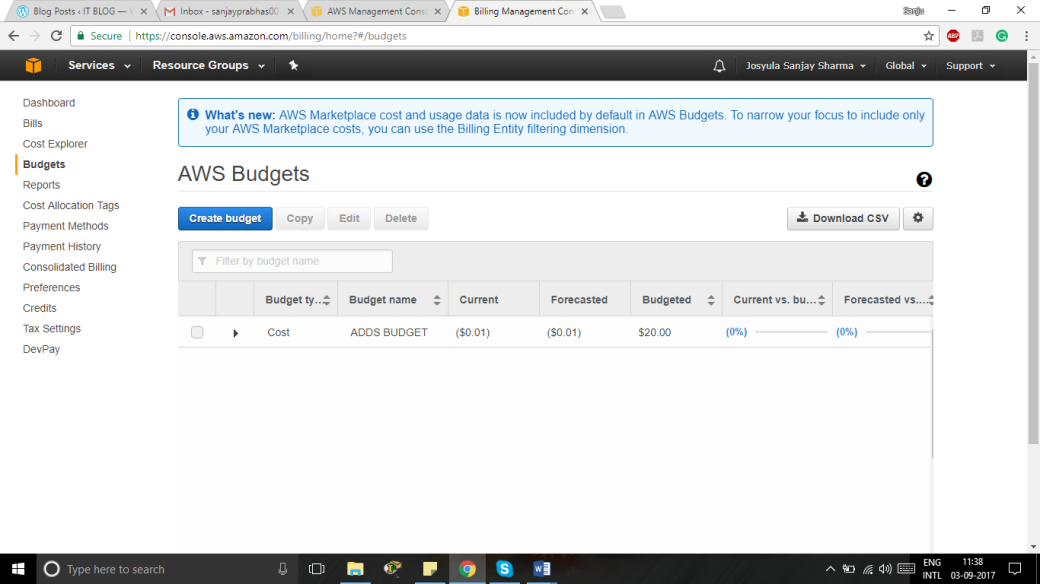
STEP 2: In here, from the left navigational menu click on “Budgets”
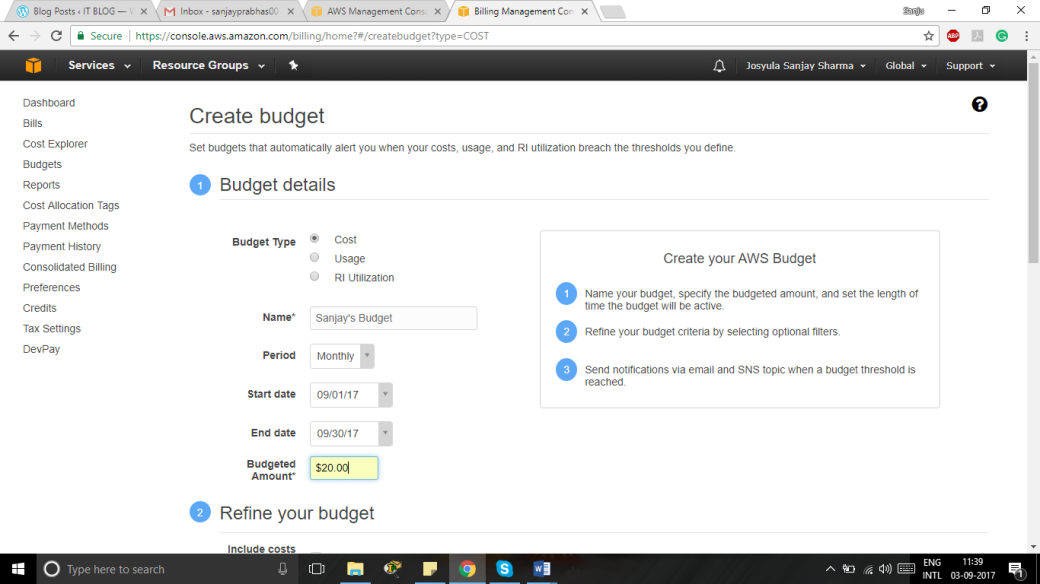
STEP 3: Click on “Create Budget” which will ask few settings which we need to setup, if we select the Budget type as Cost, we will be notified based on our cost spent on services. If we select Usage, we will be notified based on our services usages and RI Utilization means it will charge on Reserved Instance (RI) utilization. We have different pricing for each service in the different region. Generally, many choose “Cost” so we will see that budget. After that, we need to define the time Monthly, Quarterly or Annually. Minimum Budget can be created for 1 month. The best practice is to set up a budget for a minimum of 1 month which will help to track and maintain the costs.
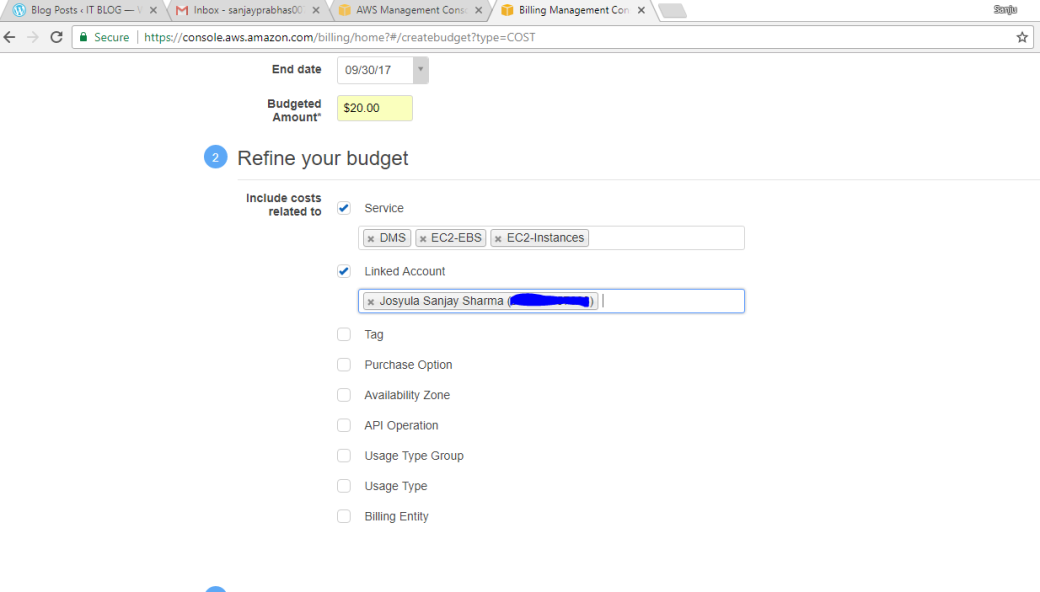
STEP 4: We must select the services for which we want to set the budget or we can link multiple AWS Accounts which will monitor all the services used for those accounts. We have good flexible options for choosing what to monitor.
STEP 5: In Notifications Tab, we need to set when to Notify us, we can choose any option as per our requirements. We have forecasting option in AWS, this means that if we keep on using the current services for 1 month they are going to charge the forecasting amount. We need to provide the Email details in here to get the notifications.
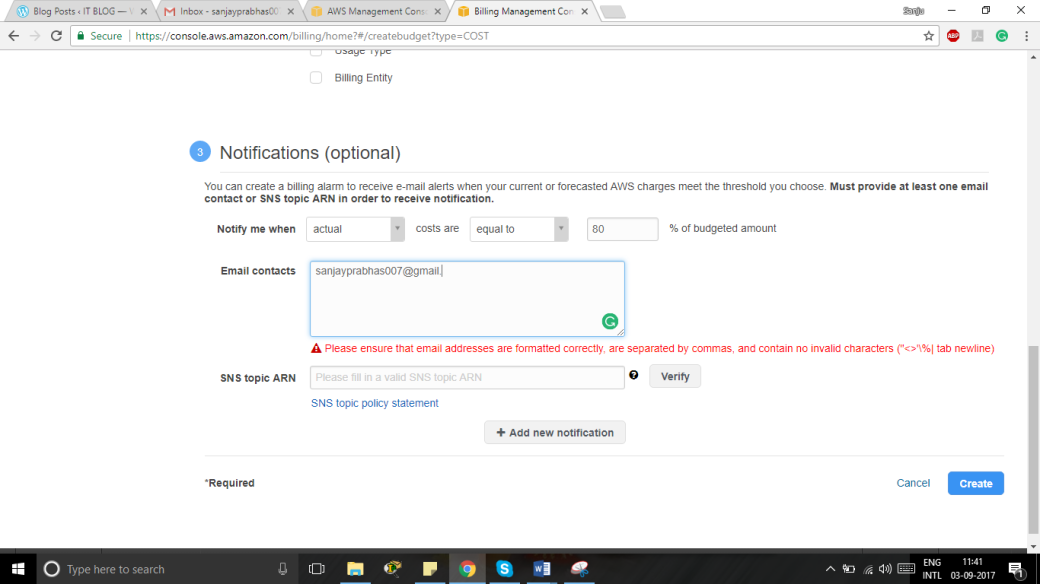
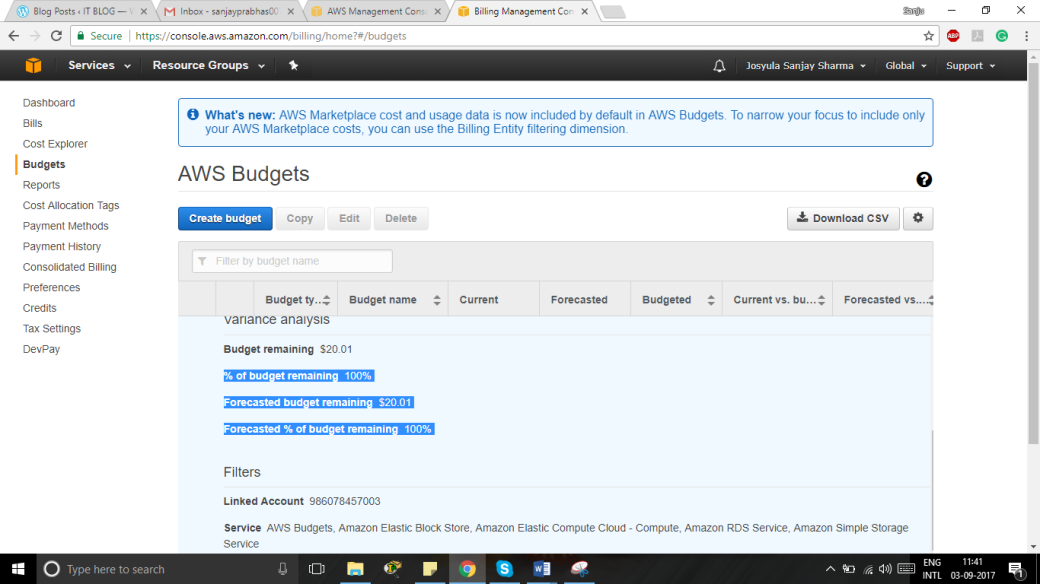
STEP 6: After tha, we can create the Budget and we can also monitor our budgets just by Clicking on that budget which we created.
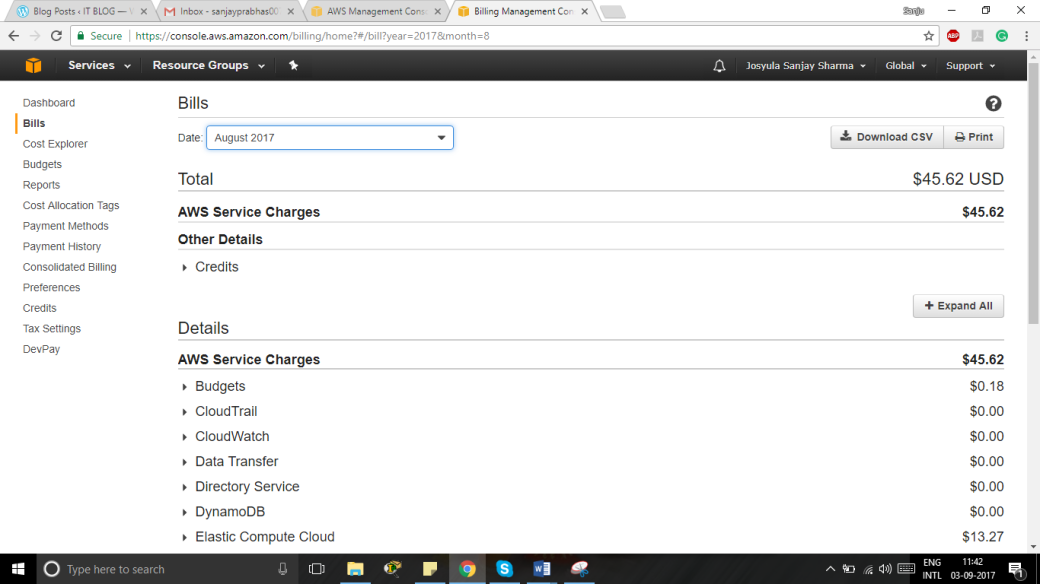
STEP 7: If we want to see what services and what aspects of those services are charged we can go to Bills from the same left navigational menu. Here we can see all services in AWS and the costs that are charged up till now will be shown here.
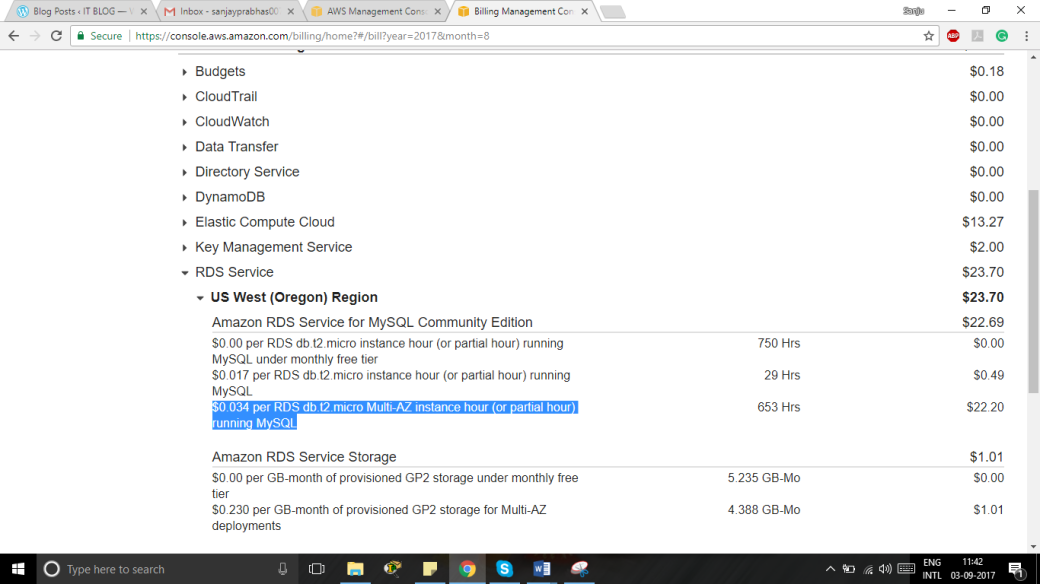
If we click on any instance we can see what aspects are charged in that service. This will give us a complete idea of costs for any services and their aspects.
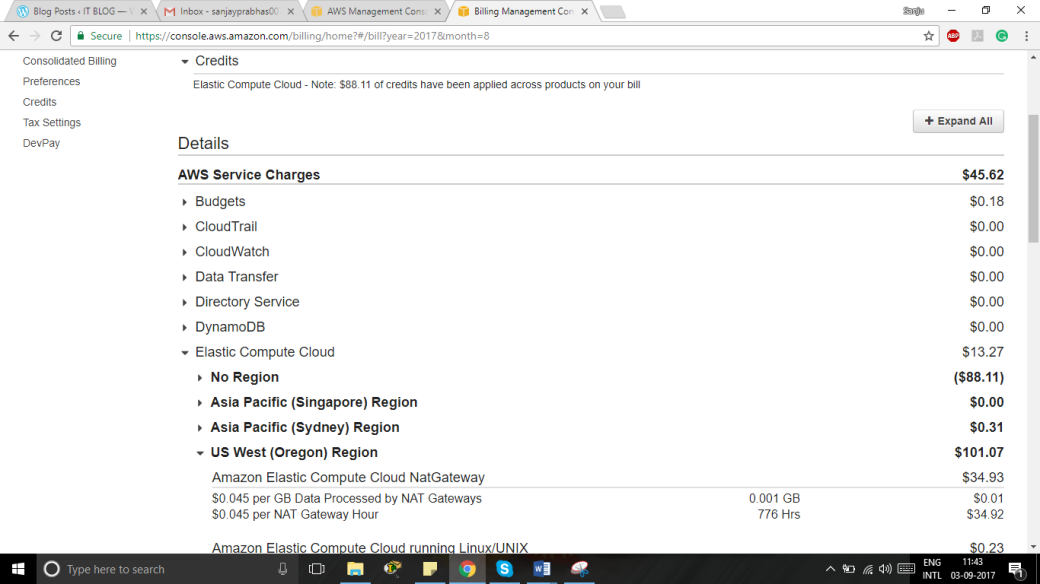
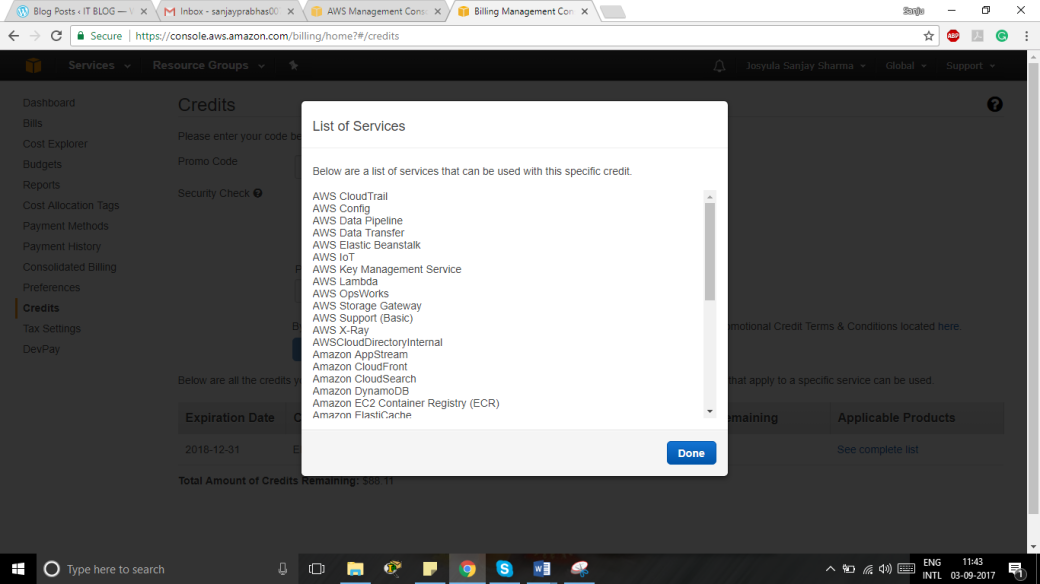
When we are using Free tier, we will get $100 credit for 2 months we had for 6 months but they keep on changing the versions. Make sure you check that all the time, under credits we can see what services these credits affect. NOT ALL SERVICES ARE FREE IN FREE TIER. We will be charged for many services even when we are using Free Tier.
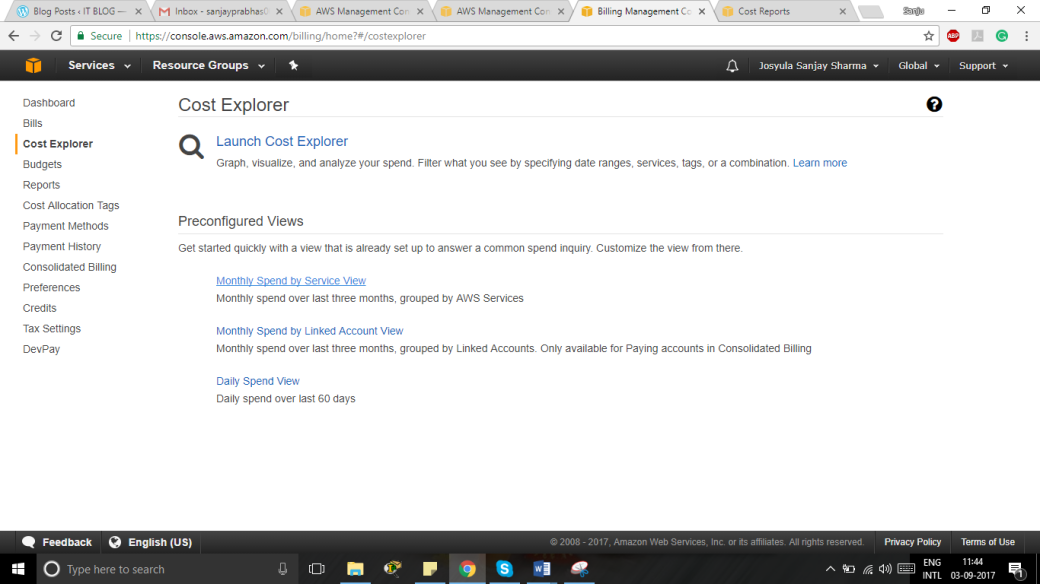
STEP 8: We have many options to the view of costs in AW if we click on “Cost Explorer” we can view the costs for service monthly.
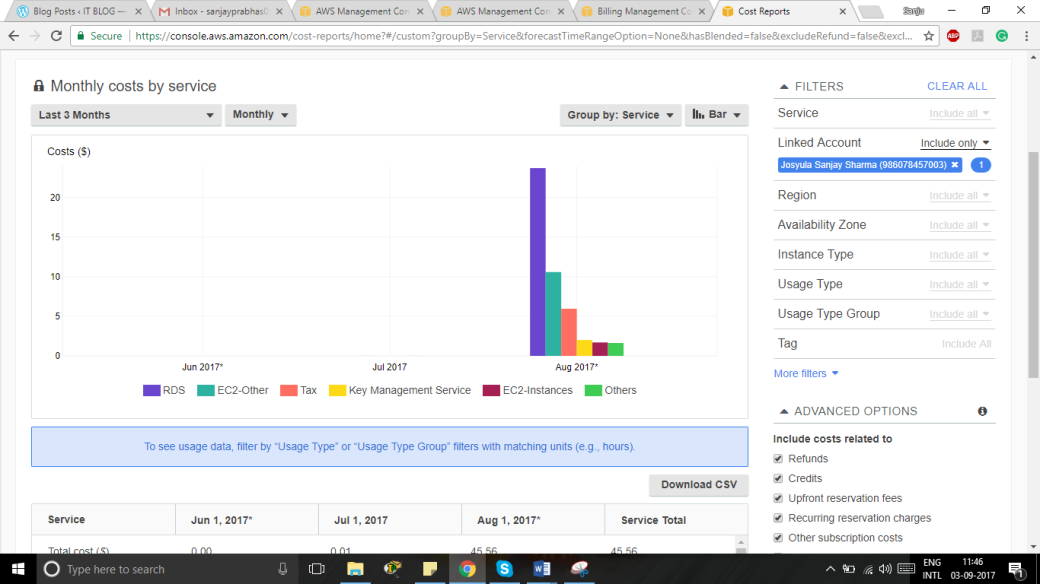
STEP 9: There is a bar chart which shows each service in monthly view. This gives us a rough idea of each service in that month.
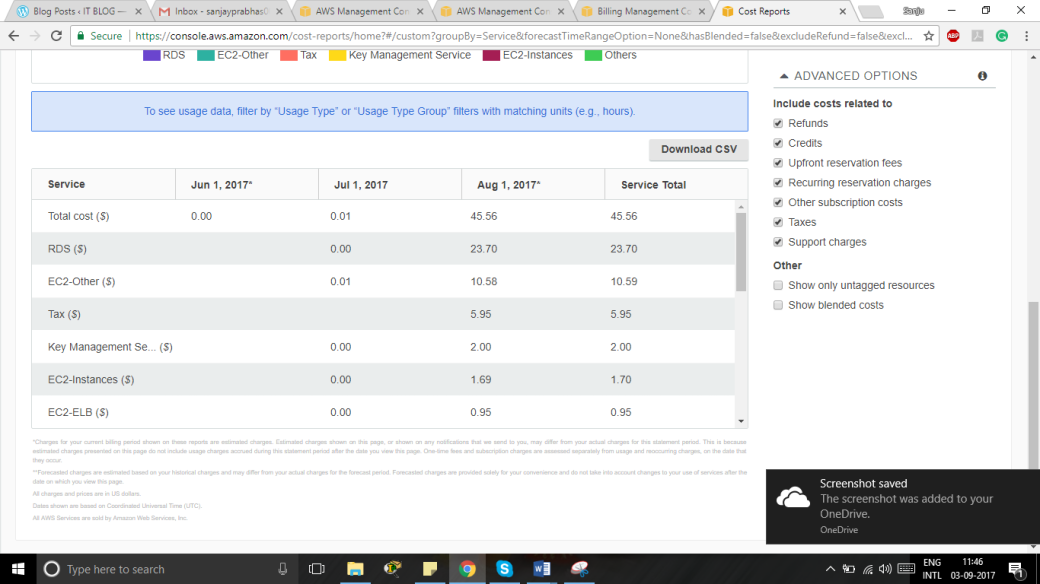
If we see at bottom we can see the exact cost of each service from past 3 months.
CONCLUSION
We have learned how to create Budget in AWS and we have seen all the options for monitoring our Costs in AWS. This will help to manage our services when we deploy them in AWS. All the pricing of services are done on hourly basis.
